Introduction
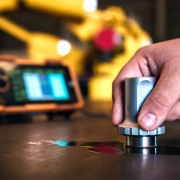
In industries where material integrity and safety are paramount, Nondestructive Testing (NDT) plays a crucial role. It allows engineers and technicians to inspect and evaluate materials, components, and structures without causing any damage. This means the tested item can continue to be used after inspection, ensuring both safety and efficiency.
What is NDT?
Nondestructive Testing (NDT) refers to a range of analysis techniques used to evaluate the properties of a material, component, or system without causing damage. NDT is crucial in industries like aerospace, construction, oil and gas, and manufacturing, where the failure of materials or structures can lead to catastrophic consequences. By using NDT, companies can ensure product integrity, quality, and safety while also preventing accidents.
Why is NDT Important?
Safety Assurance: In sectors like oil and gas, aerospace, and construction, safety is paramount. NDT helps detect potential flaws before they result in failures, protecting both workers and the public.
Cost-Efficiency: Since NDT does not damage the tested object, it eliminates the need for replacement or repair of the item post-testing. This leads to reduced downtime and lower inspection costs.
Quality Control: NDT helps maintain high-quality standards by ensuring that materials and components meet industry specifications and standards.
Compliance: Many industries are governed by strict regulatory standards. NDT is often a mandatory part of compliance, ensuring that components are safe and fit for purpose.
Common NDT Methods
There are several NDT techniques, each suitable for different types of materials and flaws. Here are some of the most commonly used methods:
1. Ultrasonic Testing (UT)
How It Works: Ultrasonic waves are transmitted into a material. Flaws or changes in material properties cause reflections, which are detected and analyzed.
Applications: Used for detecting internal defects in metals, plastics, and composites. Common in pipeline inspections, weld inspection, and metal thickness measurement.
Advantages: Can detect deep-seated flaws and provide accurate measurements.
2. Radiographic Testing (RT)
How It Works: X-rays or gamma rays are passed through a material, and the resulting image is captured on film or a digital detector. Flaws appear as variations in the image.
Applications: Ideal for inspecting welds, castings, and structural components.
Advantages: Can detect internal and surface defects in thick materials.
3. Magnetic Particle Testing (MT)
How It Works: A magnetic field is applied to a ferromagnetic material. Surface and near-surface defects disturb the magnetic field, causing magnetic particles to gather and form an indication.
Applications: Used for detecting surface and subsurface defects in ferromagnetic materials like steel.
Advantages: Quick and easy to apply, making it suitable for large areas.
4. Liquid Penetrant Testing (PT)
How It Works: A liquid penetrant is applied to the surface of a material. The liquid enters any surface-breaking defects. Excess penetrant is removed, and a developer is applied to draw the penetrant out of the defects, making them visible.
Applications: Commonly used for detecting cracks and other surface-breaking defects in metals, plastics, and ceramics.
Advantages: Simple, cost-effective, and can be applied to various materials.
5. Eddy Current Testing (ECT)
How It Works: An alternating current is passed through a coil, creating an electromagnetic field. When the coil is placed near a conductive material, eddy currents are induced. Changes in these currents indicate flaws.
Applications: Used for detecting surface and near-surface defects in conductive materials, especially in aerospace and automotive industries.
Advantages: Sensitive to small cracks and can be used on coated materials.
6. Visual Testing (VT)
How It Works: The most basic form of NDT, using the naked eye or optical instruments to examine the surface of a material.
Applications: Suitable for detecting visible defects like cracks, corrosion, and misalignment in welds and structural components.
Advantages: Simple, low-cost, and can provide immediate results.
Nondestructive Testing (NDT) and Relevant Standards
Nondestructive Testing (NDT) methods are governed by various standards to ensure consistency, reliability, and safety. These standards are set by organizations like the American Society for Testing and Materials (ASTM) and the European Committee for Standardization (EN). Here’s a breakdown of the EN and ASTM standards relevant to each NDT method.
1. Ultrasonic Testing (UT)
Ultrasonic Testing (UT) uses high-frequency sound waves to detect internal flaws in materials. It’s widely used in industries like pipeline inspection, metal thickness measurement, and weld inspection.
EN Standards:
EN 12668: This standard specifies the requirements for equipment used in ultrasonic testing, including probes, ultrasonic pulser/receivers, and cables.
EN ISO 16810: Covers general principles of ultrasonic testing.
EN 10160: Pertains to ultrasonic testing of steel flat products of thickness equal to or greater than 6 mm.
ASTM Standards:
ASTM E114: A guide for ultrasonic pulse-echo straight-beam examination by the contact method.
ASTM E164: A practice for ultrasonic contact examination of welds and other materials.
ASTM E2375: A practice for ultrasonic testing of wrought products.
ASTM A388: A practice for ultrasonic examination of steel forgings.
2. Radiographic Testing (RT)
Radiographic Testing (RT) uses X-rays or gamma rays to produce an image of the material’s interior, revealing internal defects such as cracks, voids, or inclusions.
EN Standards:
EN ISO 17636-1: Specifies the techniques for radiographic testing of fusion-welded joints in metallic materials.
EN ISO 11699-1: Defines the classification of film systems for industrial radiography.
EN 444: Addresses the examination of metallic materials by radiography.
ASTM Standards:
ASTM E94: A guide for radiographic examination.
ASTM E1032: A practice for radiographic examination of weldments.
ASTM E1742: A practice for radiographic examination using industrial X-ray film.
ASTM E747: A practice for designing image quality indicators (IQI) used in radiography.
3. Magnetic Particle Testing (MT)
Magnetic Particle Testing (MT) is used for detecting surface and near-surface flaws in ferromagnetic materials. It relies on magnetic fields and magnetic particles to identify defects.
EN Standards:
EN ISO 9934-1: Covers general principles for magnetic particle testing.
EN ISO 17638: Specifies the method for magnetic particle testing of welds.
EN 1369: Pertains to magnetic particle inspection of castings.
ASTM Standards:
ASTM E709: A guide for magnetic particle testing.
ASTM E1444: A practice for magnetic particle testing.
ASTM A275: A practice for magnetic particle examination of steel forgings.
4. Liquid Penetrant Testing (PT)
Liquid Penetrant Testing (PT) is used for detecting surface-breaking defects in non-porous materials. It involves applying a liquid penetrant to the surface and using a developer to draw out the penetrant from defects, making them visible.
EN Standards:
EN ISO 3452-1: Defines general principles for liquid penetrant testing.
EN ISO 3452-2: Specifies the testing materials for penetrant testing.
EN 1371-1: Pertains to the liquid penetrant inspection of castings.
ASTM Standards:
ASTM E165: A practice for liquid penetrant examination.
ASTM E1417: A practice for liquid penetrant testing.
ASTM E433: A reference photomicrographs for liquid penetrant inspection.
5. Eddy Current Testing (ECT)
Eddy Current Testing (ECT) is used for detecting surface and near-surface defects in conductive materials. It involves inducing eddy currents in the material and analyzing the resulting electromagnetic response.
EN Standards:
EN ISO 15548-1: Specifies the equipment used for eddy current testing.
EN 1711: Addresses the eddy current examination of welds.
EN 4050-1: Relates to the eddy current inspection of aerospace structures.
ASTM Standards:
ASTM E376: A practice for measuring coating thickness by eddy current.
ASTM E215: A practice for standardizing equipment for eddy current examination.
ASTM E243: A practice for the electromagnetic examination of seamless aluminum-alloy tube.
6. Visual Testing (VT)
Visual Testing (VT) is the simplest form of NDT, involving a visual examination of materials, components, or structures, often with the aid of optical instruments.
EN Standards:
EN ISO 17637: Specifies visual testing of fusion-welded joints.
EN 13018: Covers general principles of visual testing.
EN 970: Relates to visual examination of welds.
ASTM Standards:
ASTM E165: A practice for liquid penetrant examination (also applicable to visual examination).
ASTM E1316: A terminology for Nondestructive Examinations, including visual testing.
ASTM E337: A practice for making measurements on spectral plots for visual testing.
Choosing the Right NDT Method
Selecting the appropriate NDT method depends on various factors:
Material Type: Different materials respond differently to NDT methods. For example, Magnetic Particle Testing is suitable for ferromagnetic materials, while Eddy Current Testing works well with conductive materials.
Defect Type: The nature of the defect (surface-breaking, subsurface, internal) determines the best inspection method.
Accessibility: The accessibility of the test area can influence the choice of NDT method. Some methods require access to only one side of the material, while others need access to both.
Cost and Time: Each method varies in terms of cost, time, and equipment requirements. Balancing these factors against inspection needs is crucial.
Implementing NDT in Your Operations
If you’re considering integrating NDT into your operations, here are some steps to guide you:
Assess Your Needs: Identify the types of materials and components you work with and the types of defects you need to detect.
Consult Experts: NDT specialists can help you choose the most appropriate method and provide training for your team.
Invest in Quality Equipment: Ensure you use reliable and calibrated NDT equipment to obtain accurate results.
Train Your Personnel: NDT requires skilled technicians. Invest in proper training and certification for your personnel.
Regular Inspections: Implement a regular inspection schedule to ensure ongoing safety and compliance.
Common Challenges and Solutions in NDT
False Indications: NDT can sometimes produce false positives or negatives, leading to incorrect assessments. Solution: Use multiple NDT methods to cross-verify results and ensure personnel are well-trained.
Access Limitations: Some components may be difficult to access for testing. Solution: Use portable NDT equipment and techniques suitable for hard-to-reach areas.
Environmental Conditions: Factors like temperature, moisture, and lighting can affect certain NDT methods. Solution: Prepare the inspection area adequately and choose methods that are less sensitive to environmental conditions.
Conclusion
Nondestructive Testing (NDT) is an invaluable tool for ensuring the safety, reliability, and integrity of materials and structures across various industries. By selecting the right NDT method and implementing it effectively, companies can detect potential issues early, reduce maintenance costs, and ensure compliance with industry standards. Whether you’re in aerospace, construction, or oil and gas, NDT offers a solution to maintaining high-quality standards while preventing failures and accidents.


